Contact Us


How to Remove and Install a Bostingner Thermostatic Valve Cartridge
A thermostatic valve cartridge is the heart of your Bostingner thermostatic shower system, ensuring precise temperature control and anti-scald protection. However, over time, it may require maintenance or replacement due to mineral buildup, reduced water flow, or temperature fluctuations.
If you're experiencing irregular water temperature, difficulty adjusting heat levels, or leaks, replacing the thermostatic cartridge may solve the issue. In this guide, we'll walk you through how to remove and install a Bostingner thermostatic valve cartridge step by step.
Why Replace the Bostingner Thermostatic Valve Cartridge?
Before diving into the process, here are some common signs that indicate a cartridge replacement is needed:
1. Temperature Fluctuations:
If your shower temperature is inconsistent or doesn't stay at your preferred setting.
2. Reduced Water Flow:
If you notice weak water pressure or blockage despite cleaning the showerhead.
3. Leaks from the Valve Body:
If water is dripping from the control valve even when the shower is off.
4. Difficulty Turning the Knob Button:
If the knob button becomes stiff or unresponsive when adjusting the temperature.
Tools and Materials You’ll Need
Before starting, gather these tools to ensure a smooth process:
-
Adjustable wrench – For loosening the valve components.
-
Screwdriver – To remove the handle and trim plate.
-
Allen (hex) key – If the handle is secured with a hex screw.
-
Pliers – To help grip and remove the cartridge.
-
Plumber’s grease – To lubricate the new cartridge for easy installation.
-
Soft cloth & vinegar – To clean mineral deposits inside the valve body.
- Replacement thermostatic valve cartridge – Ensure it matches your Bostingner shower system model.
PS: Bostingner has a 5-year free cartridge replacement after-sales service. If you have purchased a Bostingner shower system before, please send the order ID, product model and question to sale@bostingner.com to get a free cartridge.
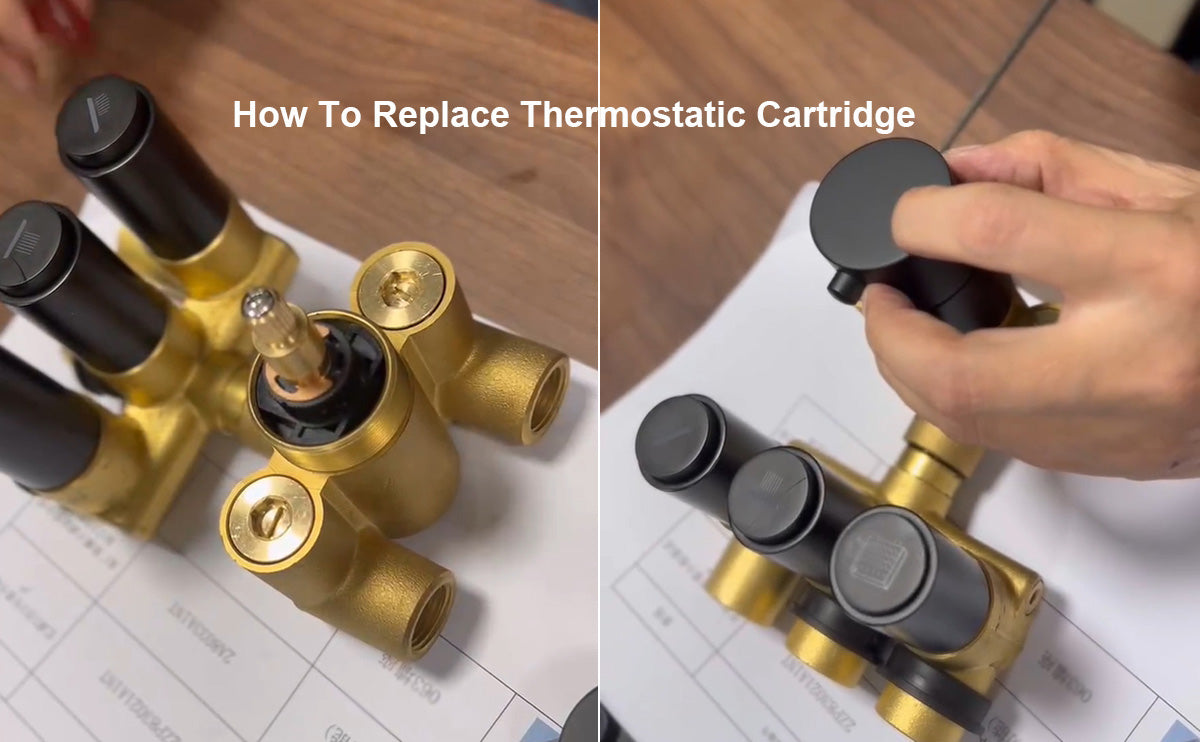
How to Replace the Bostingner Thermostatic Valve Cartridge
Installing a new thermostatic cartridge ensures your shower system operates at peak performance. Please remove the Bostingner thermostatic valve cartridge first and then install Bostingner thermostatic valve cartridge.
1. How to Remove the Bostingner Thermostatic Valve Cartridge
To see the full removal process, watch this video:
How To Remove Bostingner Thermostatic Valve Cartridge
2. How to Install the New Bostingner Thermostatic Valve Cartridge
To see the full installation process, watch this video:
How To Install Bostingner Thermostatic Valve Cartridge
After replacing thermostatic valve cartridge , turn the water back on and test the shower. Make sure the temperature remains stable, the water pressure is normal, and there are no leaks. If everything works smoothly, your Bostingner thermostatic shower system is back to delivering a consistent, comfortable, and safe shower experience.
Final Thoughts: Keep Your Shower Running Smoothly
Replacing your Bostingner thermostatic valve cartridge is a straightforward DIY task that can restore optimal water temperature control and improve your shower experience. Regular maintenance—such as cleaning the cartridge and checking for mineral buildup—can extend its lifespan and prevent issues before they arise.
If you still experience problems after replacing the cartridge, it may be best to contact Bostingner support (sale@bostingner.com) or a professional plumber for further assistance.
If you're working on your Bostingner shower system, you may also find these guides helpful:
How to Remove and Install Push Button Cartridge:
How to Install Knob Button for Thermostatic Shower Valve:
Join Our VIP Gourp

Here we will do:
- Provide good after-sales service;
- Do giveaway activities every once in a while;
- You will have the opportunity to experience new products for free;
- We will select people who share good pictures or videos and give them a gift for free.
- Get the latest news of Bostingner, such as discounts, clearance, new product releases, tips, etc.
- Want to join us? Clik this link: Join Bostingner VIP Group
Leave a comment